
Windows has long been the default choice for everyday users. However, most web developers prefer Linux as their native development environment. That said, with the right tools, Windows can become a powerful web development platform—one that feels just like working on a true production-ready setup.
If you’re looking for speed, flexibility, and simplicity, Laragon is arguably the best choice—and a serious upgrade over the traditional XAMPP stack that once dominated the scene.
Why Developers Prefer Laragon Over XAMPP#
For years, XAMPP was the go-to solution. But as web projects grew more complex, its limitations became harder to ignore. Some of the most common pain points include:
- Complicated configuration – Manually editing config files can be tedious and error-prone.
- Outdated interface – The UI feels clunky and behind modern standards.
- Version management issues – The biggest drawback: running multiple versions of PHP simultaneously is difficult and inconvenient.
Laragon changed the game by offering a modern interface and seamless switching between language versions (PHP, MySQL, Node.js) with just a single click.
Laragon Features and Built-In Tools#
Once you install Laragon, you immediately get a complete development toolkit—pre-configured and ready to go:
| Tool | Description |
|---|---|
| PHP & MySQL | The core engine for web development and databases. |
| Apache & Nginx | Flexible web server options. |
| Node.js & npm | For building modern JavaScript applications. |
| Redis & Memcached | Improve performance through caching. |
| Git | Version control for your codebase. |
How to Install Laragon on Windows#
Installation is straightforward—just like any other Windows application:
- Download the installer from the official Laragon website.
- Follow the standard installation steps.
- Launch the program, and all services will be ready to run.
That’s it—no complex setup required.
Managing PHP Versions in Laragon#
One of Laragon’s biggest competitive advantages is multi-version PHP support. Here’s how to add a new version (such as PHP 8.1 or 8.0).
Method 1: Quick Add (Recommended)#
Inside the application:
- Go to Tools
- Select Quick Add
- Choose the PHP version you need
Laragon will automatically download and configure it for you.
Method 2: Manual Installation#
If your desired version isn’t listed:
- Download the ZIP archive of the PHP version from the official PHP for Windows site.
- Extract it into:
C:\laragon\bin\php- From the Laragon interface, right-click and select your new PHP version.
Managing Multiple Node.js Versions#
Laragon makes handling Node.js versions just as easy:
- Via Quick Add – For recent versions (e.g., Node.js 22).
- Manually – Download the archive from the official Node.js site and extract it into:
C:\laragon\bin\nodejsNote: This same approach works for databases like MySQL or even other languages such as Python.
Installing phpMyAdmin in Laragon#
To manage databases through your browser, you can install phpMyAdmin in two ways:
Quick Method#
- Go to Tools > Quick Add > phpMyAdmin
Manual Method#
- Download phpMyAdmin from the official website.
- Extract the files.
- Rename the folder to
phpmyadmin. - Move it to:
C:\laragon\etc\apps- Access it via:
http://localhost/phpmyadminDefault login credentials:
- Username:
root - Password: (leave blank)
One-Click HTTPS (SSL) Activation#
One of Laragon’s most powerful features is its ability to enable SSL locally with a single click. Instead of manually generating certificates and tweaking configuration files, you can secure your local site instantly.
Here’s how:
- Right-click anywhere inside the Laragon interface.
- Select Apache (or Nginx, if you’re using it).
- Go to SSL and click Enabled.
- Grant administrator permission when prompted.
- The server will restart automatically.
You can now access your project via https://.
This is especially important when testing features like push notifications, authentication flows, or payment integrations—many of which require HTTPS even in development.
Virtual Hosts: Say Goodbye to Messy Localhost URLs#
With XAMPP, your project URL typically looks like:
localhost/project-nameThis often leads to path and routing headaches.
Laragon automatically creates a Virtual Host for every folder you create inside:
C:\laragon\wwwFor example, if you create a folder named mysite, Laragon will automatically make it accessible at:
http://mysite.testWhy This Is Better#
- Realistic environment – It feels like working with a real domain.
- Cleaner routing – No subfolder path conflicts.
- Custom extensions – You can change
.testto.devor any extension you prefer via Preferences.
Quick Comparison: Laragon vs XAMPP vs WampServer#
Here’s a side-by-side breakdown to help you choose:
| Feature | Laragon | XAMPP | WampServer |
|---|---|---|---|
| Speed & Lightweight | Extremely fast and lightweight | Moderate | Relatively heavy |
| PHP Version Switching | One-click | Complex and manual | Available but requires extra packages |
| Automatic Virtual Hosts | Yes | No (manual hosts file edits required) | No (manual setup required) |
| SSL/HTTPS Setup | Built-in and simple | Manual and complex | Somewhat complex |
| Node.js/Python Support | Built-in support | Not supported by default | Not supported by default |
| Portability | Fully portable (can run from a USB drive) | Difficult to move | Tied to Windows system paths |
A Pro Tip#
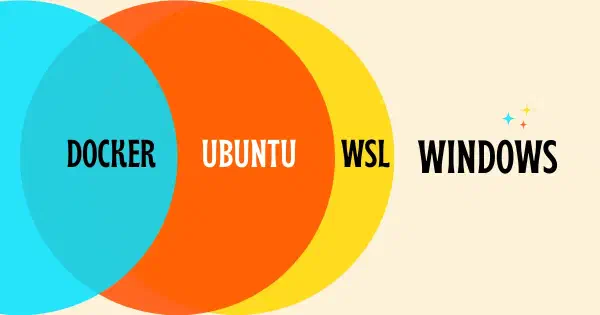
If you want a development environment that mirrors real production servers even more closely, consider using WSL (Windows Subsystem for Linux). Pair it with Docker and you’ll have a fully isolated Linux-based development setup—while still working comfortably inside Windows.