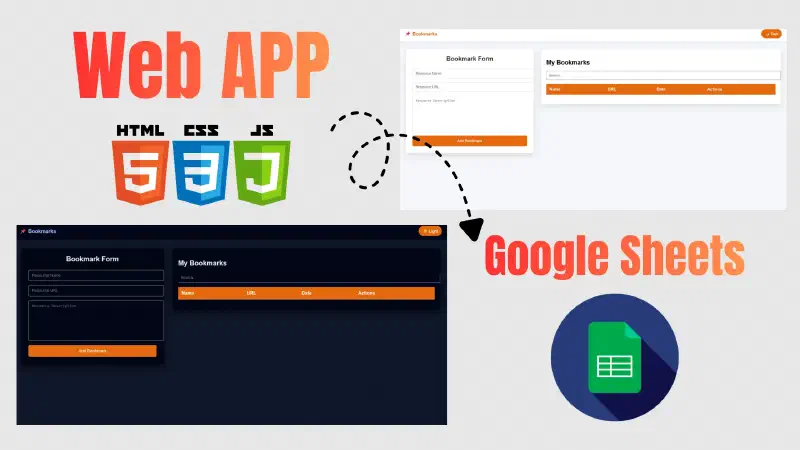
Have you ever dreamed of building a fully functional web app to manage your favorite links without the headache of paid database subscriptions or complex setups? In this guide, we’ll dive deep into how to submit an HTML form to Google Sheets without Google Forms. You’ll learn exactly how to transform a simple spreadsheet into a high-performance engine capable of handling full CRUD operations (Create, Read, Update, and Delete).
Whether you’re searching for a seamless way to send data to Google Sheets or looking to build a professional-grade Bookmark web app, you’ve come to the right place.
What is the Bookmark Manager Project?#
Think of this project as a sophisticated “Personal Knowledge Hub.” It’s a custom-built system designed to help you curate and organize YouTube channels, websites, and technical resources. Instead of relying on generic browser extensions, we are building a standalone Web App that leverages the Google Sheets API as a robust, cloud-based backend.
Key Technical Features#
This application balances simplicity with the core functionalities required of any modern web platform. It is a full-scale CRUD application, allowing you to perform database operations with the same flexibility as MySQL or other relational databases.
| Feature | Description |
|---|---|
| Full CRUD | Seamlessly Create, Read, Update, and Delete records. |
| Real-time Search | An intelligent search bar for instant resource retrieval. |
| Dynamic Pagination | Optimized performance by displaying the latest 5 entries per page. |
| Dark Mode Support | A modern, eye-friendly UI that toggles between Light and Dark themes. |
| Responsive Design | Fully optimized for mobile, tablet, and desktop using modern CSS. |
Project Architecture & Tech Stack#
To build this app, we’ll combine the “Golden Trio” of web development with the power of Google’s Cloud ecosystem:
- HTML5: Crafting the semantic structure for forms and data displays.
- CSS3: Styling the interface and implementing the Dark Mode logic.
- JavaScript (ES6+): Handling the application logic, API calls, and data binding.
- Google Apps Script: The engine that acts as a bridge between your frontend and Google Sheets.
Key Takeaway: Using Google Sheets as a database is an ideal solution for small to medium-sized projects. It provides a free, user-friendly data management interface that eliminates the learning curve of SQL while offering the reliability of Google’s cloud infrastructure.
Phase 1: Building the Application Structure (Frontend)#
We will begin by creating a directory named BookmarkSheet to hold our core project files.
BookmarkSheet/
│
├── index.html
├── style.css
├── main.js
1. The index.html File#
This file consists of the following sections:
The Basic Structure: This represents the standard boilerplate for any web page. Additionally, we have linked both the JavaScript and CSS files.
<!DOCTYPE html>
<html lang="en">
  <head>
    <meta charset="UTF-8" />
    <meta name="viewport" content="width=device-width, initial-scale=1.0" />
    <title>Bookmarks APP</title>
    <link rel="stylesheet" href="style.css" />
  </head>
  <body>
    <script src="main.js"></script>
  </body>
</html>
Loader: A visual element that appears during data processing (Update/Delete/Create).
<div id="loader" class="loader hidden"> <div class="spinner"></div> <p>Loading...</p> </div>Navbar: Contains the application name and the theme toggle switch.
<nav class="navbar">
  <div class="nav-brand">📌 Bookmarks</div>

  <button id="themeToggle" class="theme-btn">🌙 Dark</button>
</nav>
Page Container: Includes the registration form, which consists of three fields (Resource Name, URL, and Description).
<div class="page-container">
  <!-- Form -->
  <form id="bookmarkForm">
    <h2>Bookmark Form</h2>

    <input type="text" name="name" placeholder="Resource Name" required />
    <input type="url" name="url" placeholder="Resource URL" required />
    <textarea
      name="description"
      placeholder="Resource Description"
    ></textarea>
    <button type="submit">Add Bookmark</button>
  </form>
</div>
Table Wrapper: Used for displaying data, the search field, and navigation controls (Pagination).
<div class="page-container">
  <!-- Form -->

  <!-- Table -->
  <div class="table-wrapper">
    <h2>My Bookmarks</h2>

    <input
      type="text"
      id="searchInput"
      placeholder="Search..."
      style="margin-bottom: 15px; padding: 8px; width: 100%"
    />

    <table id="dataTable">
      <thead>
        <tr>
          <th>Name</th>
          <th>URL</th>
          <th>Date</th>
          <th>Actions</th>
        </tr>
      </thead>
      <tbody></tbody>
    </table>

    <div id="pagination" style="margin-top: 15px; text-align: center"></div>
  </div>
</div>
2. The style.css File#
This is where we style our elements to give them a professional look. If you’d rather not spend too much time on styling, you can simply copy the provided code to ensure a modern appearance that fully supports Dark Mode.
Body Styling.
body {
  margin: 0;
  min-height: 100vh;
  background: #f5f7fa;
  font-family: Arial, sans-serif;
}
Navbar Styling.
/* Navbar */
.navbar {
  height: 60px;
  background: #ffffff;
  display: flex;
  align-items: center;
  justify-content: space-between;
  padding: 0 25px;
  box-shadow: 0 2px 10px rgba(0, 0, 0, 0.08);
  position: sticky;
  top: 0;
  z-index: 100;
}

.nav-brand {
  font-size: 18px;
  font-weight: bold;
  color: #e5690e;
}

.theme-btn {
  background: #e5690e;
  color: #fff;
  border: none;
  padding: 8px 14px;
  border-radius: 20px;
  cursor: pointer;
  font-size: 14px;
  transition: 0.3s;
}

.theme-btn:hover {
  background: #9f4504;
}
Styling the Page Container and HTML Form.
/* Main Layout */
.page-container {
  display: flex;
  gap: 30px;
  padding: 30px;
  align-items: flex-start;
}

/* Form */
#bookmarkForm {
  flex: 1;
  max-width: 450px;
  background: #fff;
  padding: 25px;
  border-radius: 8px;
  box-shadow: 0 10px 25px rgba(0, 0, 0, 0.1);
  display: flex;
  flex-direction: column;
  gap: 15px;
}

#bookmarkForm h2 {
  text-align: center;
  margin: 0 0 10px;
  color: #333;
}

#bookmarkForm input,
#bookmarkForm textarea {
  width: 100%;
  padding: 10px 12px;
  border: 1px solid #ddd;
  border-radius: 5px;
  font-size: 14px;
}

#bookmarkForm textarea {
  resize: none;
  height: 120px;
}

#bookmarkForm button {
  padding: 12px;
  border: none;
  border-radius: 5px;
  background: #e5690e;
  color: #fff;
  font-size: 15px;
  cursor: pointer;
  transition: 0.3s;
}

#bookmarkForm button:hover {
  background: #9f4504;
}
Styling the HTML Table.
/* Table Wrapper */
.table-wrapper {
  flex: 1;
  background: #fff;
  padding: 20px;
  border-radius: 8px;
  box-shadow: 0 10px 25px rgba(0, 0, 0, 0.1);
  overflow-x: auto;
}

/* Table */
table {
  width: 100%;
  border-collapse: collapse;
}

th,
td {
  padding: 12px;
  border-bottom: 1px solid #eee;
  text-align: left;
}

th {
  background: #e5690e;
  color: #fff;
}

tr:hover {
  background: #f1f1f1;
}
Responsive Design Section.
/* Responsive Navbar */
@media (max-width: 600px) {
  .navbar {
    padding: 0 15px;
  }

  .nav-brand {
    font-size: 16px;
  }

  .theme-btn {
    padding: 6px 12px;
    font-size: 13px;
  }
}

/* Responsive */
@media (max-width: 992px) {
  .page-container {
    flex-direction: column;
    align-items: center; /* 👈 التوسيط الأفقي */
  }

  #bookmarkForm,
  .table-wrapper {
    width: 100%;
    max-width: 500px; /* اختياري */
  }
}
Styling the Spinner Loader.
.loader {
  position: fixed;
  top: 0;
  left: 0;
  width: 100%;
  height: 100%;
  background: rgba(255, 255, 255, 0.8);
  display: flex;
  flex-direction: column;
  justify-content: center;
  align-items: center;
  z-index: 9999;
}

.loader.hidden {
  display: none;
}

.spinner {
  width: 45px;
  height: 45px;
  border: 4px solid #ddd;
  border-top: 4px solid #e5690e;
  border-radius: 50%;
  animation: spin 1s linear infinite;
}

.loader p {
  margin-top: 12px;
  color: #333;
  font-size: 14px;
}

@keyframes spin {
  to {
    transform: rotate(360deg);
  }
}
Finally, the Dark Mode Styles.
/* ========== DARK MODE ========== */
body.dark {
  background: #0f172a;
  color: #e5e7eb;
}

body.dark .navbar {
  background: #020617;
}

body.dark .nav-brand {
  color: #a5b4fc;
}

body.dark #bookmarkForm,
body.dark #bookmarkForm h2,
body.dark .table-wrapper {
  background: #020617;
  color: #e5e7eb;
  box-shadow: 0 10px 25px rgba(0, 0, 0, 0.6);
}

body.dark .table-wrapper a {
  color: #e5690e;
}

body.dark input,
body.dark textarea {
  background: #020617;
  border-color: #1e293b;
  color: #e5e7eb;
}

body.dark table th {
  background: #e5690e;
}

body.dark table td {
  border-color: #1e293b;
}

body.dark tr:hover {
  background: #1e293b;
}

body.dark .loader {
  background: rgba(2, 6, 23, 0.85);
}

body.dark .loader p {
  color: #e5e7eb;
}
Phase 2: Setting up Google Sheets and Apps Script#
This is the most critical part of making a Google spreadsheet available with a web application.
Database Setup Steps:#
- Create a new Google Sheet and name it “Bookmarks.”
- In the first row, define the following headers:
ID,Name,URL,Description,Date. - Navigate to Extensions, then select Apps Script.
Apps Script Functions:#
We will need two primary functions to handle HTTP requests:
doGet(e): Responsible for fetching data (Read), handling search queries (Search), and managing pagination.
function doGet(e) {
  const sheet = SpreadsheetApp.getActiveSheet();
  const rows = sheet.getDataRange().getValues();
  rows.shift(); // remove headers

  const search = (e.parameter.search || "").toLowerCase();
  const page = parseInt(e.parameter.page || 1);
  const limit = parseInt(e.parameter.limit || 5);

  // Map data
  let data = rows.map((r) => ({
    id: r[0],
    name: r[1],
    url: r[2],
    description: r[3],
    date: r[4],
  }));

  // 🔽 Sort: newest → oldest
  data.sort((a, b) => {
    if (!a.date) return 1;
    if (!b.date) return -1;
    return new Date(b.date) - new Date(a.date);
  });

  // 🔍 Search
  if (search) {
    data = data.filter((row) => row.name.toLowerCase().includes(search));
  }

  // 📄 Pagination
  const total = data.length;
  const start = (page - 1) * limit;
  const paginatedData = data.slice(start, start + limit);

  return jsonResponse({
    data: paginatedData,
    total,
    page,
    totalPages: Math.ceil(total / limit),
  });
}
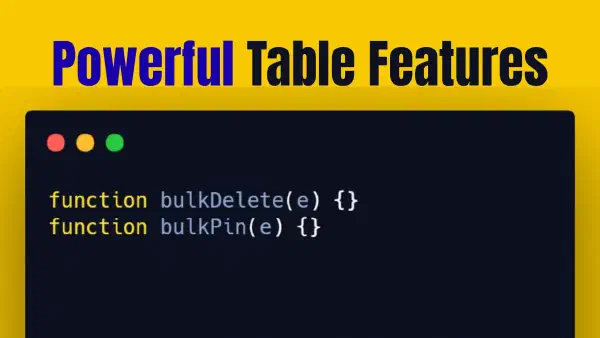
doPost(e): Responsible for operations that require data modification, such as adding, editing, and deleting records.
function doPost(e) { const action = e.parameter.action; if (action === "create") return createRow(e); if (action === "update") return updateRow(e); if (action === "delete") return deleteRow(e); return jsonResponse({ error: "Invalid action" }); }createRow(e): Responsible for saving data into the Google Sheet.
/* ===== CREATE ===== */ function createRow(e) { const sheet = SpreadsheetApp.getActiveSheet(); const id = Utilities.getUuid(); sheet.appendRow([ id, e.parameter.name, e.parameter.url, e.parameter.description, new Date(), ]); return jsonResponse({ success: true, id }); }updateRow(e): Responsible for updating existing data within the Google Sheet.
/* ===== UPDATE ===== */ function updateRow(e) { const sheet = SpreadsheetApp.getActiveSheet(); const rows = sheet.getDataRange().getValues(); for (let i = 1; i < rows.length; i++) { if (rows[i][0] === e.parameter.id) { sheet .getRange(i + 1, 2, 1, 3) .setValues([ [e.parameter.name, e.parameter.url, e.parameter.description], ]); return jsonResponse({ success: true }); } } return jsonResponse({ error: "ID not found" }); }deleteRow(e): Responsible for deleting data from the Google Sheet.
/* ===== DELETE ===== */ function deleteRow(e) { const sheet = SpreadsheetApp.getActiveSheet(); const rows = sheet.getDataRange().getValues(); for (let i = 1; i < rows.length; i++) { if (rows[i][0] === e.parameter.id) { sheet.deleteRow(i + 1); return jsonResponse({ success: true }); } } return jsonResponse({ error: "ID not found" }); }jsonResponse: Instead of repeating the response logic multiple times, we created this function to standardize how data is sent back to the frontend.
/* ===== Helper ===== */
function jsonResponse(data) {
  return ContentService.createTextOutput(JSON.stringify(data)).setMimeType(
    ContentService.MimeType.JSON,
  );
}
Developer Alert:
When performing a Deploy, ensure you select Web App as the deployment type and set access to Anyone. This allows your web application to access the data without authentication hurdles. Additionally, make sure to save the URL after deployment, as we will need it for the JavaScript file.
Phase 3: Integration Using JavaScript#
Now, we will bring everything together in the main.js file. This file is responsible for transforming the static HTML into a fully interactive application.
- Defining Variables: Fetching the form, the Loader, and the table elements by their respective IDs.
const form = document.getElementById("bookmarkForm");
const loader = document.getElementById("loader");
const tableBody = document.querySelector("#dataTable tbody");- Sheet URL: Adding the URL obtained during the Deploy process to link the Frontend with the Backend.
const SHEET_URL = "https://script.google.com/macros/s/url-like-this/exec";- Loader Control: Building two functions to show and hide the Loader element.
/* ===== Helper ===== */
function showLoader() {
  loader.classList.remove("hidden");
}

function hideLoader() {
  loader.classList.add("hidden");
}- loadTable (Fetching Data): The function responsible for fetching data from the Google Sheet and displaying it in the table. It also handles search queries and pagination logic.
/* ===== Load Table Data ===== */
let currentPage = 1;
let currentSearch = "";
const limit = 5;

function loadTable() {
  showLoader();

  const url = `${SHEET_URL}?search=${encodeURIComponent(
    currentSearch,
  )}&page=${currentPage}&limit=${limit}`;

  fetch(url)
    .then((res) => res.json())
    .then((res) => {
      renderTable(res.data);
      renderPagination(res.totalPages);
    })
    .catch(() => {
      alert("Failed to load table ❌");
    })
    .finally(() => {
      hideLoader();
    });
}- Rendering: Inside the
loadTablefunction, we built two helper functions,renderTableandrenderPagination, to convert the raw data from Google Sheets into table rows.
/* ===== Table Data ===== */
function renderTable(data) {
  tableBody.innerHTML = "";

  data.forEach((row) => {
    const tr = document.createElement("tr");
    tr.innerHTML = `
          <td data-id="${row.id}">${row.name}</td>
          <td>
            <a
              href="${row.url}"
              data-url="${row.url}"
              data-description="${row.description}"
              title="${row.description}"
              target="_blank"
            >
              Visit
            </a>
          </td>
          <td>${new Date(row.date).toLocaleString()}</td>
          <td>
            <button onclick="editRow('${row.id}')">✏️</button>
            <button onclick="deleteRow('${row.id}')">🗑️</button>
          </td>
        `;

    tableBody.appendChild(tr);
  });
}

/* ===== Pagination UI ===== */
function renderPagination(totalPages) {
  const container = document.getElementById("pagination");
  container.innerHTML = "";

  for (let i = 1; i <= totalPages; i++) {
    const btn = document.createElement("button");
    btn.innerText = i;

    btn.style.margin = "0 5px";
    btn.disabled = i === currentPage;

    btn.onclick = () => {
      currentPage = i;
      loadTable();
    };

    container.appendChild(btn);
  }
}- editRow(id): The function responsible for the editing workflow of a specific Bookmark.
let currentEditId = null;

function editRow(id) {
  const row = [...document.querySelectorAll("#dataTable tbody tr")].find(
    (tr) => tr.children[0].dataset.id === id,
  );

  currentEditId = id;

  const link = row.querySelector("a");

  form.name.value = row.children[0].innerText;
  form.url.value = link.dataset.url;
  form.description.value = link.dataset.description;

  form.querySelector("button").innerText = "Update Bookmark";
}- deleteRow(id): The function responsible for deleting a specific Bookmark.
function deleteRow(id) {
  if (!confirm("Are you sure?")) return;

  showLoader();

  fetch(SHEET_URL, {
    method: "POST",
    body: new URLSearchParams({
      action: "delete",
      id,
    }),
  }).then(loadTable);
}- Data Management: Adding Event Listeners to handle form submission, whether for “Adding a new item” or “Updating an existing one.”
/* ===== Submit Form ===== */
form.addEventListener("submit", function (e) {
  e.preventDefault();
  showLoader();

  const action = currentEditId ? "update" : "create";

  const formData = new URLSearchParams({
    action,
    id: currentEditId || "",
    name: this.name.value,
    url: this.url.value,
    description: this.description.value,
  });

  fetch(SHEET_URL, {
    method: "POST",
    body: formData,
  })
    .then(() => {
      alert("Sent successfully ✅");
      form.reset();
      currentEditId = null;
      form.querySelector("button").innerText = "Add Bookmark";
      loadTable(); // reload table after submit
    })
    .catch(() => {
      alert("Error ❌");
    });
});- Data Search: Adding Event Listeners to handle real-time search filtering within the table.
/* ===== Search Debounce ===== */
const searchInput = document.getElementById("searchInput");

let debounceTimer;
searchInput.addEventListener("input", function () {
  clearTimeout(debounceTimer);

  debounceTimer = setTimeout(() => {
    currentSearch = this.value;
    currentPage = 1;
    loadTable();
  }, 400);
});- Theme Toggle: The code responsible for switching between Light and Dark modes.
const themeToggle = document.getElementById("themeToggle");

// load saved theme
if (localStorage.getItem("theme") === "dark") {
  document.body.classList.add("dark");
  themeToggle.innerText = "☀️ Light";
}

themeToggle.addEventListener("click", () => {
  document.body.classList.toggle("dark");

  const isDark = document.body.classList.contains("dark");
  themeToggle.innerText = isDark ? "☀️ Light" : "🌙 Dark";
  localStorage.setItem("theme", isDark ? "dark" : "light");
});- Initial Load: The final line of code that triggers the initial data fetch from Google Sheets to populate the HTML Table upon page load.
/* ===== Initial Load ===== */
loadTable();The Final User Experience#
Once you finish coding, you will find that the application runs smoothly:
- Real-time Interaction: When adding a “YouTube Channel,” it will appear instantly in your Google Sheets database.
- Seamless Editing: The edit button populates the form with existing data; once saved, the sheet updates automatically.
- Professional Feedback: The delete function works precisely, accompanied by a Loader to ensure a professional and responsive user experience.
Frequently Asked Questions (FAQ)#
How do I send data to Google Sheets?
This is achieved by sending a POST request using the JavaScript fetch API to the Google Apps Script Web App URL, which then executes the command to write the data into the sheet.
Can I use this system as a private search engine?
Yes! The application includes a search field that filters results based on the resource name stored in your database.
Building a Bookmark web app using Google Sheets is a fantastic way to learn how to interact with APIs and develop simple yet effective Full-stack applications. We’ve covered how to create a web form to get data from Google Sheets and manage it entirely.
Are you ready to launch your application?
The code on GitHub: