

Here’s the English translation of your text, keeping the same structure, tone, and Markdown formatting:
After we saw in the previous part how to use Metadata in HTML, now it’s time to talk about semantic tags and the difference between them and non-semantic tags.
HTML tags are divided into two main types:
- Semantic Elements
- Non-Semantic Elements
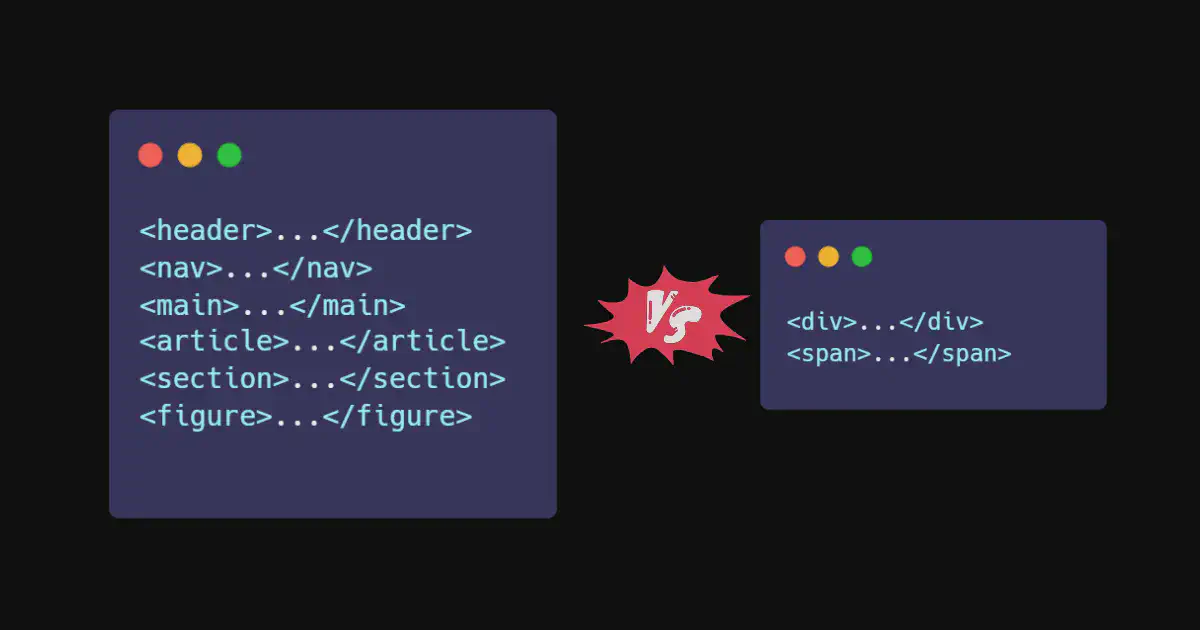
The Difference Between Semantic and Non-Semantic Tags#

Semantic elements in HTML are simply elements that have a clear meaning, describing their role or the type of content inside them — both for the browser and for the developer reading the code.
For example, when you see a tag like <header> or <footer>, you immediately understand that it represents the top section (header) or the bottom section (footer) of the page, without even looking at its inner details.
Examples of semantic elements:
<article>: Represents an independent article or post.<nav>: Contains the website’s navigation links.<section>: A specific part of the page that groups related content.<header>and<footer>: Represent the page or section header and footer.<figure>and<figcaption>: Used to display images or illustrations with their captions.<main>: Represents the main content area of the page.
Using these elements makes your code cleaner and easier to read, and it also helps search engines and assistive technologies (like screen readers) understand the content more accurately.
In short, semantic elements make your web page organized, meaningful, and easy to maintain — both for humans and browsers.
Uses of Non-Semantic Elements#
They can also be called content or layout tags. These tags are used to structure and style the content of the page.
They don’t add meaning to the content itself, but they help you organize elements and apply CSS styling to them easily.
The <div> Tag – General Container Element#
The <div> tag is the most commonly used tag in HTML, and it serves as a general container to group multiple elements together, so you can style or control their appearance using CSS or JavaScript.
Example:
<div class="card">
<h2>Article Title</h2>
<p>This is an example of using a <div> tag as a container.</p>
</div>
Note:
We’ll later learn the difference between Block Elements vs Inline Elements.
The <div> tag is a block-level element, meaning it automatically starts on a new line.
The <span> Tag – Inline Text Container#
The <span> tag is used to style a small portion of text or a specific inline element without creating a line break.
Example:
<p>This is a <span style="color: red;">red-colored</span> text.</p>
Main Difference:
<div>→ Used to group large sections or elements.<span>→ Used to style small portions of text.
When you start building web pages, you’ll rely heavily on these tags, since most modern web layouts are based on using <div> to divide the page into sections — such as the header, main content, sidebar, and footer.
Then, you use CSS to control the positioning, colors, and size of each part.
Example:
<div class="header">Header</div>
<div class="content">Main Content</div>
<div class="footer">Footer</div>
In short:
<div> and <span> are the foundation of any HTML layout, and what brings them to life is CSS, which turns them into a complete, well-designed web page.
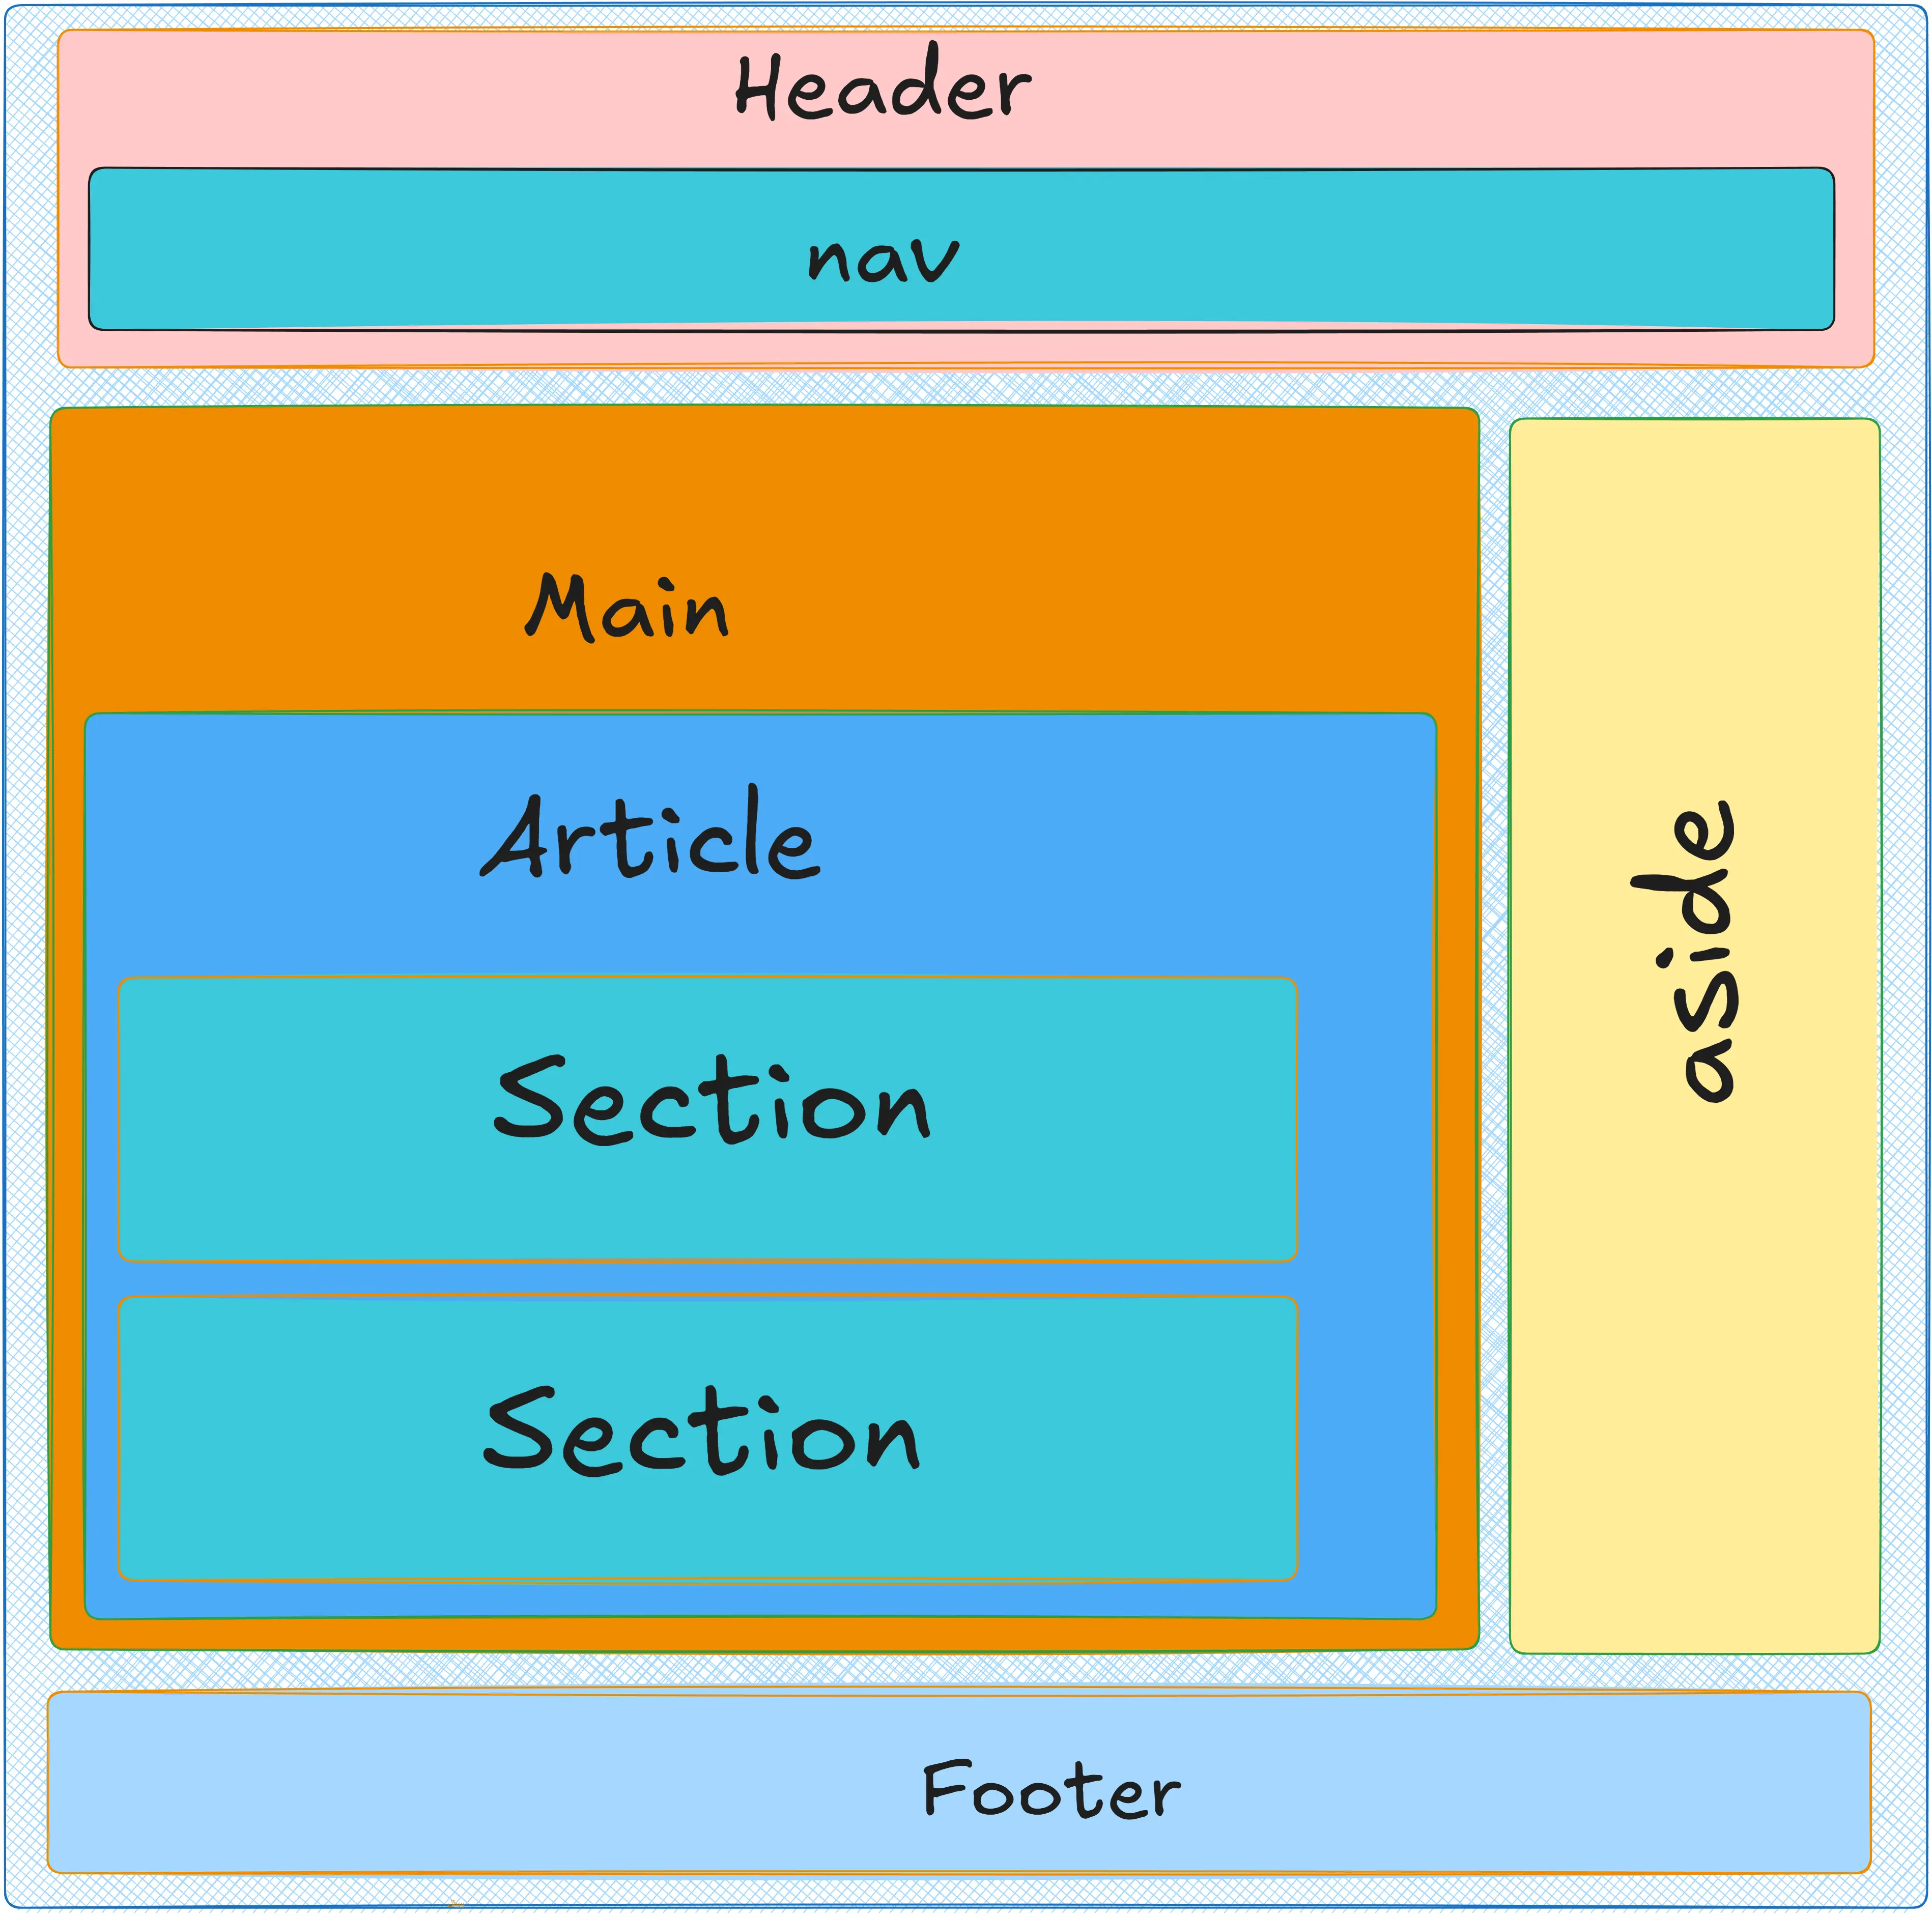
Uses of Semantic Elements#
As we’ve seen examples of semantic elements in HTML, now it’s time to explore how each of these elements is used.
1. The <header> Tag – Page or Section Header#
The <header> tag is used to create the top section or introduction of a page, which usually contains elements that introduce the website or make navigation easier.
Inside a <header>, you can include elements such as:
- The main heading of the page or website (like
<h1>or<h2>). - The logo or site icon.
- Navigation links that help users move to different parts of the site.
- Or even information about the author or the content.
Example:
<header>
  <h1>CodeZelo Title</h1>
  <img src="CodeZelo-logo.png" alt="CodeZelo Logo">
  <nav>
    <a href="#about">About</a>
    <a href="#projects">Projects</a>
    <a href="#contact">Contact</a>
  </nav>
</header>
You can use more than one <header> on the same page — for example, one at the top of the main page, and another inside an article or a specific section.
<header> inside another <header>, <footer>, or <address>.In short, <header> acts as the introductory section of any page or content block, helping users quickly understand where they are and how to navigate through the site.
2. The <nav> Tag – Navigation Menu#
The <nav> tag in HTML is used to define a navigation section of the page.
Simply put, it’s the part that helps users move between different pages or sections of the website — like the top navigation bar you see on the CodeZelo website.
Inside <nav>, you can include links that take the user to places like: the Home page, About Us, Services, Contact, and so on.
Example:
<nav>
  <a href="index.html">Home</a>
  <a href="about.html">About</a>
  <a href="services.html">Services</a>
  <a href="contact.html">Contact</a>
</nav>
<nav>.
This tag is meant only for main navigation links, not for random links within the content.Another benefit is that browsers and screen readers (used by people with disabilities) can recognize <nav> and handle it intelligently — improving user experience and accessibility.
In short, <nav> is the section that contains your site’s primary navigation links, keeping your HTML clean, organized, and easy to understand — both for browsers and developers.
3. The <main> Tag – Main Content Area#
The <main> tag is used to define the main content of a web page — the part that the visitor actually came to see.
The content inside <main> should be unique and specific to that page, and it should not include repeated elements that appear on every page, like sidebars, navigation menus, logos, or copyright notices.
Example:
<main>
  <h1>Welcome to My Blog</h1>
  <p>In this article, we’ll discuss the basics of HTML for beginners.</p>
</main>
Important Notes:
- There should only be one
<main>element per page. - You should not place
<main>inside elements like<header>,<footer>,<nav>, or<article>.
In short, <main> is the heart of the page — it holds the core content that users are there for, and it helps search engines and screen readers quickly identify where the important information is.
4. The <section> Tag – A Subsection Within the Page#
The <section> tag in HTML is used to create a section (part) within a webpage that groups together a set of related elements.
So, if you have a long page containing different topics, you can divide it into sections using <section> to make your code more organized and clear.
Each <section> usually contains a heading (like <h2> or <h3>) and some content related to that same idea.
Simple Example:
<section>
  <h2>About the Website</h2>
  <p>This website is designed to help beginners learn HTML in a simple and easy way.</p>
</section>

<section>
  <h2>Our Services</h2>
  <p>We offer lessons and practical examples in web design and development.</p>
</section>
Important Notes:
- The
<section>tag is a semantic element, meaning it tells the browser and search engines the purpose of that part of the page. - It helps organize the content logically, making the code easier to read and maintain.
In short, <section> is a tag used to divide a webpage into related parts, each with a clear topic or idea.
5. The <article> Tag – An Independent Piece of Content#
The <article> tag is used to define self-contained content, meaning a section of the page that can stand on its own and still make sense even if viewed separately from the rest of the page.
Content placed inside an <article> is usually something like:
- A blog post
- A news report or article
- A forum post
- Or even a comment or standalone social media post
Simple Example:
<article>
  <h2>The Importance of Learning HTML</h2>
  <p>HTML is the first step for anyone who wants to enter the world of web development. Without it, no website can function properly.</p>
</article>
<article> tag doesn’t have a special visual style in browsers, but it helps organize your content and makes your code clearer and more professional.
Of course, you can use CSS to style it and control its appearance.In short, <article> is the tag used for independent and complete content within a page — like an article or news piece — that can be displayed on its own without losing its meaning.
6. The <aside> Tag – Sidebar or Supplementary Content#
The <aside> tag is used to add side content or additional information that’s related to the main content, but not directly part of it.
A common use of <aside> is as a sidebar on a webpage — just like what you see in blogs or news websites.
Simple Example:
<article>
  <h2>Learn HTML Step by Step</h2>
  <p>HTML is the foundation of building any website...</p>

  <aside>
    <h3>Quick Tip</h3>
    <p>Always start your page with the <!DOCTYPE html> declaration.</p>
  </aside>
</article>
Important Notes:
- The content inside
<aside>is indirectly related to the main content. - It doesn’t have a special appearance in the browser by default, but you can style it using CSS to make it look like a sidebar or a separate box.
In short, <aside> is the perfect place for any extra information or side notes that support the main content without being part of it directly.
7. The <footer> Tag – Page or Section Footer#
The <footer> tag is used to define the footer of a page or section — the part that usually appears at the bottom and contains identifying or important information.
Content inside a <footer> might include:
- Author information or copyright details
- Contact links or social media links
- Quick links (like “Back to Top” or “Privacy Policy”)
- A site map or related document links
You can even use multiple <footer> elements on the same page —
for example, one at the bottom of the entire page, and another inside a specific article or section.
Simple Example:
<footer>
  <p>© 2025 All Rights Reserved – Learn HTML Website</p>
  <a href="#top">Back to Top ↑</a>
</footer>
<footer> tag doesn’t have a default visual style in browsers, but you can use CSS to style it so it appears neatly organized at the bottom of the page.In short, <footer> is where you place the ending part or final information related to the page or section it belongs to.
Summary#
After seeing the differences between semantic and non-semantic tags, you might ask yourself: Should I rely on just one type and ignore the other?
Of course not. These tags are designed to complement each other, not to replace one another.
When you start working on real-world coding projects, you’ll find yourself using both types effectively. With practice and by following proper HTML coding standards, you’ll learn when to use semantic tags and when to use standard ones.
In the next lesson, we’ll talk about Content & Text Elements — and how to control the appearance of text using HTML tags.